Container Details - Floor and Ceiling Shape Tabs
Click on the main Containers tab, or use the F6 key.
Click on the either the Floor Shape or the Ceiling Shape tab, which is visible only if the Container is of type 'Airline (ULD)'.
On this tab you can enter data to change the shape of the Container in either front or left-side view. You will then get a drawing to help you check the shape data.
Given the view, Cube-IQ lets you define points where the floor/ceiling height changes. Such a point requires a coordinate and the height of the floor/ceiling at that coordinate. In 'front view', the coordinate is the distance from the left to right. In 'left-side view', it is the distance from the back.
The two outside points should always be in the list. Also, you cannot have two points at the same coordinate. For any straight-up Container wall, create a minimal angle by setting one coordinate for example 0.01 distance units from the previous one.
The floor and ceiling can only be irregular in the same view. If you need to define a 'shape' in the other view as well, you can simulate this using several 'unusable spaces'.
Theoretically you can set up an irregular floor that changes height in 'left-side view', but the optimization of Cube-IQ cannot handle this set up. It is possible to make this left-view setup work by cleverly adding Zones. Please contact MagicLogic Support for help.
Here is an example of an irregular ceiling:
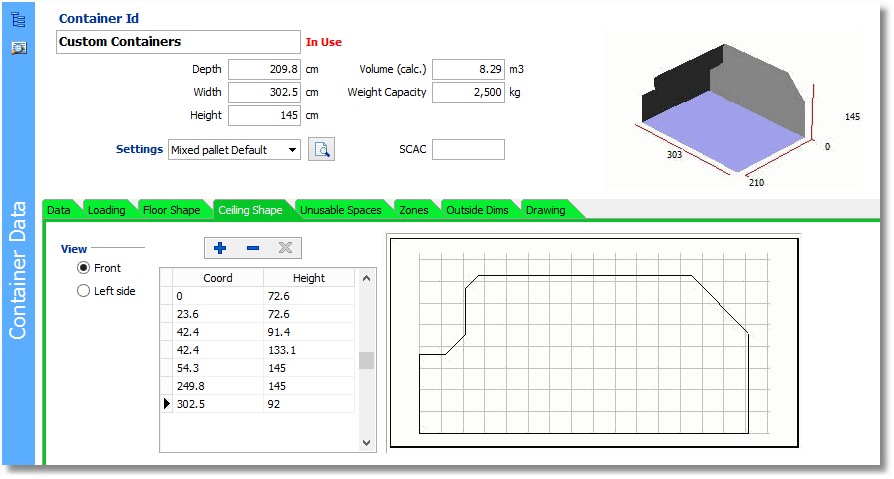
Note that the ceiling height changes direction at seven coordinates, and that we made the fourth coordinate minimally different from the third..
At floor/ceiling coordinates that are not in the list, Cube-IQ will calculate the height through interpolation. A change to a point will only show when you leave the row in the grid (which is when it gets stored in the database).
Adding/deleting a floor or ceiling point is done by using the database buttons above the small grid. To delete you can also place the cursor in the left-most column of the row to be deleted, and hit Ctrl+Del (which must be followed by confirmation).
Some more explanation by example:
•A Container with a sliced-off corner on one side requires a minimum of three height-change points.
•A Container with sliced-off corners on both sides requires at least four height-change points.
•Rounded corners can be described by introducing several pairs of height-points along the curve. The more points you define, the closer you can approximate true rounding.