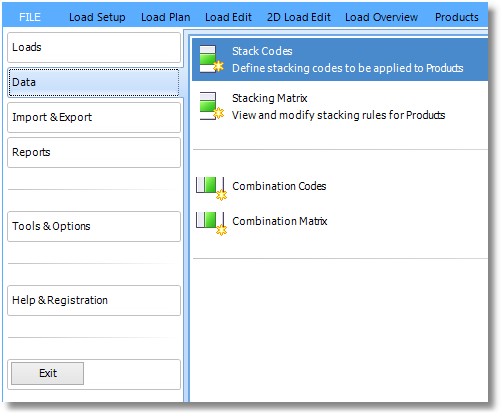
Products - Stack Codes
Stack Codes
From the File Menu, choose Data / Products / Stack Codes , and, after creating appropriate stacking codes, select Data / Products / Stack Matrix .
In Cube-IQ the user can set up stacking rules in two different ways. The first method is to use the stacking index, as can be defined for each orientation of a Product.
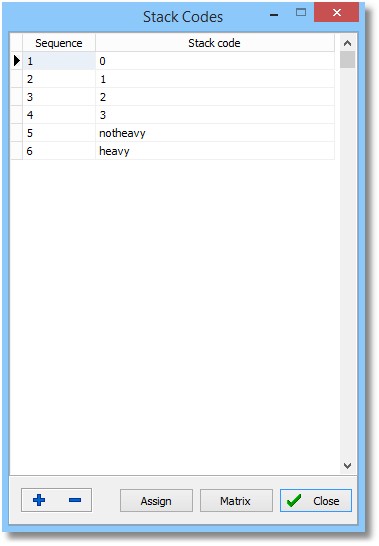
Secondly, as discussed here, a stacking code can be allocated to each Product. These codes have to be defined first in the Stacking Codes window shown below. Sequence indicates in which sequence the codes will appear in the stacking matrix. If you change a sequence number, the other ones will automatically be renumbered or shifted up. On exit, the numbering will be changed to 1, 2, 3, ...
To allocate the currently selected code to multiple Products, click the Assign buttun. This takes you to the following window:
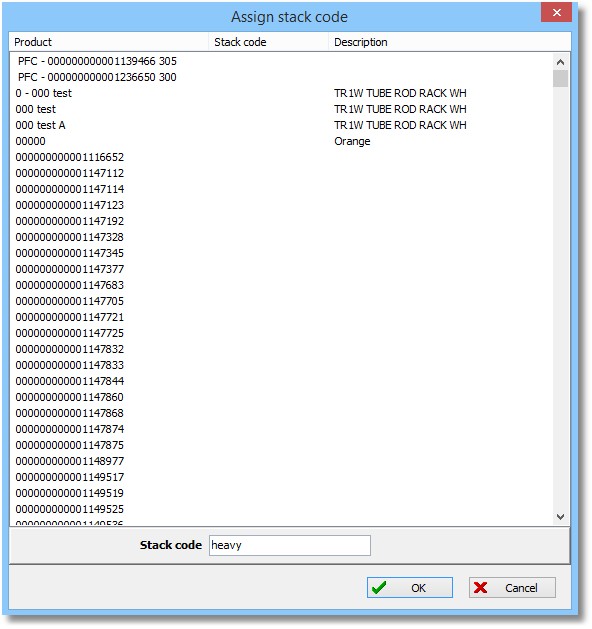
You can use the standard Windows list key clicks to make multiple selections (as done above), and then click the Done button to give each selected Product the current Stacking Code. To select a consecutive series of Products, click on the first one, then hold down the Shift and click on the last Product. You can also hold down the Ctrl key to select random multiple Products.
To set up the stacking matrix, choose the Data / Products / Stacking Matrix menu . This displays the following Window, showing all existing stacking codes in the order of their sequence numbers:
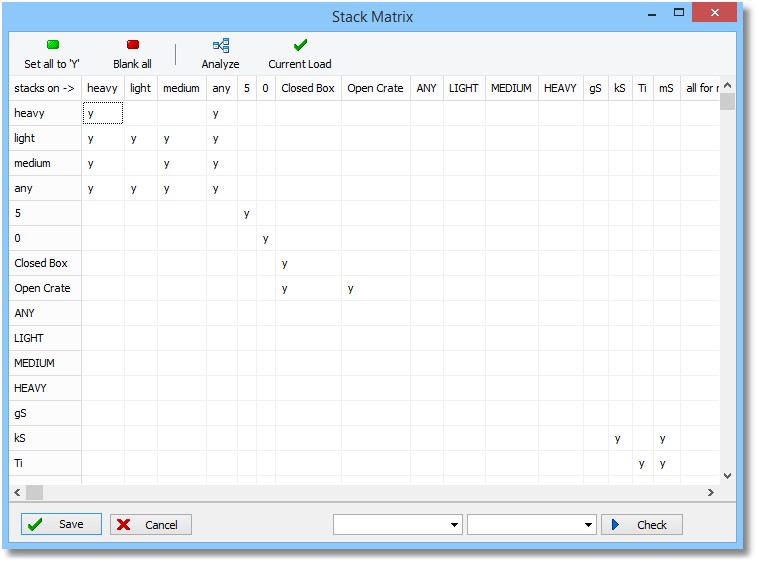
In this window you can set for each pair of codes whether a Product with the first code can be stacked on one with the second code. If there are codes and there is a stacking matrix, Products without a code are assumed to be loadable on and under any other Product.
You can click the Analyze button to get an overview of which codes can be combined or skipped on your Loads.
Click the Save button to store your changes.
The Set all to 'Y' and Set all to 'N' buttons allow you to quickly change the whole table.